June 30, 2011

#39- Can you Handle It?

We're back in the kitchen, and next up on the list is another small tweak that we are hoping will go a long way.  As I've mentioned, based on your responses to this post, we're going to give the natural wood a chance and stick with these color cabinets for awhile.  (We can always paint or stain them down the road if we change our mind.)  So all that's left to do at this point is to clean them up a bit as there are a few places with water damage that need to be refinished and to add hardware.  And a few of you with eagle eyes out there busted me and noticed that we got started already.  Here are the pictures from Tuesday's kitchen cabinet post:


Yep, we've added some really clean lined, brushed silver pulls to give the room the modern edge we're going for.  Here's a better look:


At first I wasn't loving the placement.  They seem a little close together.  But as you can see, it's because of those pesky glass door cabinets.  We had to center the pulls on these cabinets within the small space provided, and since they needed to be uniform through out the kitchen, we were held hostage to this distance.  They are starting to grow on me now though.  Plus, you can't really change the location of cabinet hardware unless you plan to paint the cabinets (you'll always see the wrong holes, even if you fill them with wood fill) so I'm letting it go.  I'm also letting go of any need to make a joke about seeing the wrong holes...

The water damage on this cabinet under the sink is really obvious in this photo.  We'll get to that... eventually.

One nice little unintended bonus of the pulls- we can finally figure out how to close our lazy susans!  We have one in each corner, and they each have a definite bottom door that needs to be closed first, and top door that needs to be closed last.  Since they overlap, they can't both have a pull, so putting the pull just on the top door gives us an easy reminder which one to shut first.   It's the little things...
Our mini kitchen reno is almost complete.  Next up, the sink and counter tops!  To be continued....

June 29, 2011

You Want Me to Put My TV Where?

There are lots of amazing things about the bonus Family Room on the lowest level of our home.  Quiet TV Zone of the house- check.  Walk in Basement gives lots of natural light- check.  Fireplace to cozy up to while watching movies on a cold winter night- double check.  We even like how this fireplace has the same style mantel as the one upstairs, which is located directly above it, and gives the house the feel that it is one continuous piece.  There are a number of problems with this room too though, (those lights, the cat door, the buffet just to name a few...) But the biggest problem is where in the heck, in this TV room, are we going to put a TV?

Picture from the Inspection.  We've since given the walls a coat of paint and added our "new" sectional.

You may remember from The Bungalow, that our last basement hosted ample space for a large screen and projector, which we loved.  Unfortunately the width of this room just wouldn't accommodate a projector and screen, so we we put that system up on Craigslist and used our profits to purchase a brand new 50" flat screen.  She's the new love of my husband's life. She always looks gorgeous and if you don't like what she's saying you can just change the channel.  I'd hate her if I didn't have a crush on her myself. 

You may not be surprised if you've read previous posts that our first inclination was to paint the whole built-in white, tear out the piece above the fireplace, and mount a TV above there.  I mean, that could be beautiful, right?  But as we have slowly realized with the rest of the house, it certainly wouldn't fit the Modern Lodge, West Coast Natural vibe this house has going for it.  And if we try to force this very distinctly architectural house to be something that it's not, it's just going to look silly.  Plus, we hear that expensive TVs above a heat source = bad idea. 

So back to the drawing board and a place to put the TV.   Here is the existing set up:


Did you miss it?  Yep, it's that tiny little 24" wide space that was built to hold a squat, tube TV back in the day.  They even made a little pull-out and swivel shelf for it, so that someone on the right side of the fireplace could view it, if they had a pair of binoculars that is.  This certainly will not work for our slender yet broad, lovely lady.  We've considered tearing out the vertical separator between the two columns on the right, which would give us the space to place the TV there on the left side built-ins.  Not centered so not ideal, but at least we don't have to take down the fireplace feature.

So as we waited for that project, we temporarily set the TV in front of the fireplace, and a crazy thing happened, we loved it.


This may be a bit controversial, but we are seriously considering insulating the fireplace, covering it up with wood to look like the rest of the built ins, and placing the TV here.  Hold on, hold on, let me explain myself a bit.  Here's the thing, we already have an amazing, gas fireplace upstairs in the Living Room, but unfortunately the one downstairs is wood burning. Back in the day we loved the idea of the wood burning fireplace at The Bungalow, you know, because it was "real."  But we quickly learned that a real fireplace means real work- buying wood, storing it, carrying it in, cleaning up after it, etc... We just didn't use it very much.  Especially once our little animal came around. Fire + 2 Year Old Monsters = Bad.  So, "Convert it to gas burning" you say- which was definitely the original plan.  But I don't know... the focus of the room for us really is the TV, and we want it to be in a place that we can have lots of friends over for a movie night or to watch the game and everyone can see it.  And just look at it again, it looks like it was made for the space.  


We would build it in a way that was totally removable, so years from now when we have that, "What the hell were we thinking?" moment, we can simply remove it.  In the mean time, I think I'm okay with curling up in front of the fire upstairs in the Living Room or up in our Master Bedroom, and curling up in front of the TV downstairs.

What do you guys think?  Do you think we're crazy, or did we come up with the right solution?  Would you place it to the left of the fireplace on the shelf?  Or tear down the mantel and place it above the fireplace?  Let me have it!

June 28, 2011

#171- Flying Solo

The other day I found myself with 5 completely uninterrupted hours alone at my house.  It's true, this rare, lunar eclipse type moment never happens to me, and yet, there I was with 5 hours and a house full of projects.  I wasn't sure what to do, but I headed to the kitchen first to survey the Hub's recent work on the new drywall in the kitchen.  Remember when we torn out the tile counter top and back splash and it looked like this?


He made quick work of some Durrock, and now it looks like this:


Nice huh?  And since he had gotten us a big step forward towards our slightly remodeled kitchen, I thought I would use my gifted time to tackle the next big kitchen project, that off centered, strange hanging cabinet. 


I'm not sure if it's the way this cabinet throws the kitchen off balance, or if it's all its light blocking, sun hating power, but I've had it in for this cabinet since the moment that we first saw the house.  Sure, it's useful.  Having a cabinet that can be accessed from both sides for plates and dinnerware is really nice.  I bet a lot of you are going to tell me how helpful it would be if I left it, and you'd probably be right.  But did I mention how ugly it is?  For me anyway, it just ruins the flow of the space, so it had to go.  I started by taking off all the doors and the shelves inside.  See how much more open things look already?

Next I had to shut off the power and disconnect the under the cabinet lights from this piece.


Then it was time to take the cabinet down.  As I've mentioned before in our tile floor removal post, the problem with demo is that you don't really know what you've got until you get started.  I took a closer look at my cabinet and found good and bad news.  The good news was that my cabinets were definitely two separate pieces that weren't attached at all to each other. That's good considering that I was flying solo and taking down one huge piece by myself would have been tricky.  The bad news was that unlike most cabinets today that get secured to the studs with screws, my cabinets seemed to be attached with some serious, big mama framing nails.  I'm talking 3.5" long, 1/4" diameter, you could kill someone with that, nails.  I did a whole lot of work with a pry bar, chisel and hammer, and got the first little guy down without too much trouble.

Don't worry about that scary looking light fixture hanging out of the wall.  I swear all the power was turned off safely.


The small cabinet, banished forever from the Kitchen.
The big guy was held up with 4 of those monster nails though, and it wasn't going anywhere.  It was at about this point that I started to doubt whether I could actually do this project myself.  I mean, even if by some miracle it did come down, there was a pretty high potential for it to come crashing down on top of me and maybe even the stove below.  But I couldn't give up now, not with 3 hours left of quiet work time, so I kept going.  After trying for about a half and hour to pry the nails from the wall, I started to find success actually removing the nails from the cabinet instead.  The heads of the nails were small enough that they started to come out through the wood of the cabinet, even though the remained firmly planted into the wall studs. After about 20 more minutes of wiggling and prying, it finally started to come loose, and thankfully came down pretty slow and easy.  It was a heavy mother though.

Look at all that natural sun light streaming in!
Now that I had all the pieces down, I set up shop in the Screened In Porch and figured out how I was going to take these 2 partially open cabinets and rebuild them into one solid, flat piece.  I decided that I could cut off the open, corner portion of the big cabinet, and use the side piece from the small cabinet to cap it off. 

You can see the line I drew here for where I cut the cabinet.
I took the Skill Saw, and in no time had this:


All that was left was to take apart the side piece of the smaller cabinet, and attach it to the side of my new one with my finishing nailer.  (Best. Present. Ever.)  I forgot to take a photo of my triumph, probably because I was so excited to get this bad boy on the wall.  I don't recommend trying to hang cabinets by yourself, by the way, but at this point I was so proud of my success so far, that nothing (even logic) could stop me.  I rigged up a little bucket-on-top-of-the-counter type platform to hold up my cabinet high and in place while I secured it into the studs.  (With screws this time.  Sweet, easy to use screws.)


And there you have it.  In just under 4 hours my project was complete and I even had a little time to pick up before my boys came home.  We still have convenient storage for items that get used on our new kitchen table, (it's 50% full of sippy cups), but we don't have the strange asymmetrical arrangement over the peninsula.  Seriously, opening that up so that you can actually see the window behind it not only floods the room with light but makes it look 10 times bigger.  Here's the before again if you forgot:


The Kitchen really feels like one big room now, instead of the Kitchen and Kitchen Eating Area as we had referred to it before.  Now all that's left is to get those new counter tops and back splash up. What do you guys think?  Bad idea to remove the cabinet, or huge improvement?  Seriously, I want to know your opinion.  Let's get a conversation started in these comments already!

June 27, 2011

#152- Modern Family

From the beginning we've had a vision of our Family Room that makes it a modern, but lived in and comfortable space.  That's what you see, right?


Alright, this space is about as modern as a Hyper Color shirt.  Rome wasn't built in a day people, so let's start with the easy stuff, time to paint.  They may look white here, but the walls were a very dirty and scuffed up mustardy-cream color, so we were pretty pumped to get some color on them.  In order to coordinate with our "new" charcoal gray couch, we went with Stone White from Glidden.  The best part of this project- removing all the garbage from the walls, like the crazy mix of brass, wood, and almond colored switch plates:


And we took 10 years off the room just pulling down these:

Forgive the Hubby's rough iPhone photo, but he was so anxious to take these babies down he wouldn't wait until I got home from work with the proper camera.

After a few hours of painting, we cranked out the room and woke up the next morning to survey our work in the daylight:


I'd be lying if I said we both loved it immediately.  Even though it is supposed to be a light gray, it reads a little blue/purple in different lighting.  We don't hate it, and it's certainly better than the mustardtastrophe it was previously, so we'll stick with it for awhile.  I have a feeling that when we add some curtains, art and table lamps it will balance out, and to be honest, we're just too exhausted at this point to redo an entire room just because we feel so-so about it.  There are a lot of other things about this house that I hate much more than the color of the Family Room. 

Speaking of, many of you have asked about the status of the house post Bath Crashers, so here's the update:

- The drywall guy came back and patched all the holes in our walls. Hooray!  Unfortunately, he didn't paint them, so we spent all weekend painting the ceilings in the Master Bath, Master Bedroom and Dining Room and walls in the Master Bath, Master Bedroom and Laundry Room.  I'm pretty sure ceiling painting is my new least favorite home improvement.

-The electrician kindly came back and fixed some of the circuits that weren't working, but unfortunately we did not pass our electrical inspection by the city.  Apparently 13 feet of track lighting in a bathroom is okay, but 13 feet of track lighting in a bathroom/closet combo is a fire hazard.  So it looks like that track lighting we disliked may be on it's way out, without a penny from us, (fingers and toes crossed.)  We'll keep you posted.

- The tile guy should be coming back tomorrow to repair the floor and the shower curb.  He accidentally sloped the curb out of the shower, so when the water hit the curb it would flow out instead of back in, and we'd have a little "Lake Bath Crashers" in the middle of the bathroom every time we took a shower.  I can't wait for him to come back and fix it so I can feel like I'm on an episode of Cribs again. 

- We were super excited to learn from our producers on Friday that they "are working on a plan" for doors for our closets!  I thought this was going to have to be an expense we would take on ourselves, so we were thrilled that they were already coming up with a solution for us.  As always, we'll share every little detail once we know more.   There are a couple of other finishing details that we're hoping the contractor addresses this week as well.

At this stage the house is still a complete disaster, but we're hoping that by the end of the week things will start to turn around for us.  In the mean time, the Family Room is always cool and has a nice comfortable couch to watch HGTV on, and really, that's all a girl needs. 

June 24, 2011

#46- Table Talk

If we didn't already have a desperate desire for a kitchen table, the void became even more apparent after we installed our new pendant light.  Something about a low hanging pendant over an empty space says, "Get to work already."  Plus, and this is embarrassing, but this is how our kiddo has been eating his meals:


Yep, for over a month, 3 meals a day, my child has been eating at a high chair pulled up to a TV tray.  Ghet-to.  

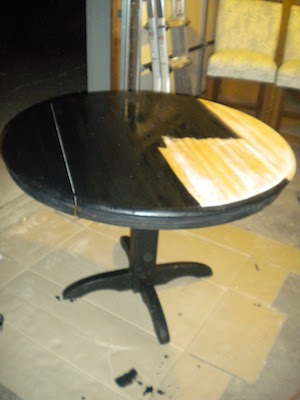
What's the hold up?  Well it appears that this is one of those situations that The Hubs and I are on completely different pages.  You see, he wanted to buy something immediately, finished and ready to go.  I wanted to save some money and refinish a used piece to make a more unique setting.  For those of you that know us well, you won't be surprised to hear that eventually, I won.  I found this guy on Craigslist for just $30 and brought him home immediately.


The sides even have an optional drop down if we want to push the table against a wall for a party to make more space.

The first reaction from my very opinionated Hubby?  "We're not putting that used piece of junk on our beautiful new floors.  I'm putting it up on Craigslist and reselling it."

Super.

I knew I had to work fast to make him love it as much as I did before he could post it for sale (and also hide the camera.)  I mean sure, it was a little rough looking, but it was everything I was looking for.  It was a pedestal with a clean lined base, the perfect 42" width to fit our space and solid wood.  That last part is key, because I know what a 2 year old can do to a perfectly innocent wood table.  Even all of the beautiful, expensive tables my Hubs wanted to buy from Crate and Barrel or West Elm had a wood veneer finish, not solid wood, and that just doesn't cut with our little Edward Scissor Hands.  This table is going to get a lot of action, through multiple kiddos, with not only meals but school and art projects for years to come, and it needs to be solid wood to stand up to that kind of abuse. 

So I started by sanding it down with a palm sander and 60 grit paper to remove the polyurethane finish. 


It takes a lot of time to get all the finish off, especially in the little corners and detailing. (Which thankfully this table had very little of.)  Here's a tip, if you shine a flashlight on the table from different angles it will help you find the shiny areas of the table that you might have missed.  After it was all removed, I wiped down the table with Tacky Cloth to remove all the dust, and got to the business of staining.

Well... sort of.  Our friend Chuck, who designs and builds incredible pieces of furniture as a hobby (he's crazy talented), suggested that if I wanted to stain the table a jet black, that I use India Ink instead of black stain.  India Ink can be found in art supply stores, and is really thin like water.  You brush it on with a sponge brush, and it absorbs completely into the wood, staining it a rich, deep black immediately.  It's not like black paint, because all the ink absorbs the wood grain still shows through. I ended up doing two coats, just to even out the finish a bit in a few areas, but it was nothing like the 7+ coats I would have had to apply to get regular stain that dark.  And the finish... fantastico! 


After that I applied 5 thin and even coats of water based polyurethane to protect this finish for the long haul.  I planned to pair this jet black table with light wood, modern chairs to coordinate with the the light wood cabinets we plan to keep as well as the dark black counter tops we plan to get.  Ikea has these at a great price of $39 a piece:

I outlined my vision to Builder Chuck and to my luck he said, "Hey, I have 4 chairs like that in my attic right now that I'm not using anymore.  Want them?"  Ah- Ibegyourpardon?  Yep, yep I do!  We went over to his house before he could change his mind, and they were even more perfect than I imagined.  The shape is more rounded and curvy which works great with our round table, and the color is just a little darker to match our cabinets.  Perfecto!


Put them together and what do you got?  Bippity-Bopity-Bouyah!


What do you think?  For the record, I got a "you were right" from the Hubs, which is way better than any Oscar or Emmy.  Plus, thanks to the sweet $30 Craigslist score, the $8 india ink and the free chairs, the whole set was less than $40!  The kitchen is really starting to come together, well, it was... until we did this:


You may remember that I love free trash removal, so the day after the Bath Crashers team left, with the dumpster still waiting outside to be picked up, Jay and I started taking down the gross green floor tile from the kitchen counter and back splash.  We've still got some more work to do, but I'll fill you in on that next week.  In the mean time we'll spend the weekend eating out, since we don't have any counters or a kitchen sink.

June 23, 2011

#22- Rebuilding the Deck Box

As I previously mentioned, we had a lot of down time at our house during our Bath Crashers filming, so The Hubs and I tried to keep ourselves busy with as many projects off The List as possible.  The problem though, was with dozens of film crew and contractors set up all over the house, there weren't very many spaces we could work that we wouldn't be getting in the way.  We went out to The Living Room Deck for a moment to get away from it all, and that's when it hit us- time to deal with that old deck box!

You many remember from previous photos that the house came with a 4' x 4' x 10' deck box that we assume was used for wood storage back when the fireplace in the Living Room was wood burning.


With the fireplace now converted to a gas burning one, this box is not only unless but it certainly had seen better days.  It takes up a whole lot of space on the deck which makes the deck look smaller, and since it is 4 feet high and 4 feet wide, it really couldn't be used as a bench without a step stool.  (More like a ladder for short Hubby and I.) I started by taking the box apart to throw the pieces in Bath Crasher's dumpster (I love free trash removal), but quickly changed my mind.


The wood on the inside was actually in pretty good shape, and after a little more inspection, the wood on the outside could probably be cleaned up as well.  So we decided instead to dismantle it, cut down the wood and rebuild the box at 2' x 2' x 10'.  This way we would still have storage, but we would gain some seating.  It wasn't hard work, but it was time consuming considering that the outside was built with dozens of cedar panels that slide into each other to form one solid piece.  Each one had to be trimmed down 18 inches, as well as the 2x4s that made up the base of the box.


We got into a rhythm though, and once all the pieces were apart, I measured, cut and told The Hubs where to put it together, and he assembled. 

Notice the huge pile of cut wood next to my saw.
Maybe it was the beautiful weather, the tunes we were playing, or the fact that contractors were installing a $50,000 bathroom for us just above, but it was an incredible afternoon.  I know you all probably think I'm crazy (and you'd be right), but that afternoon was exactly the reason why we bought The Lodge to begin with.  Just my Hubs and I, having fun and building something together.  Even the Bath Crashers crew kept making fun of us, "Well, look at the lovebirds..." An within an hour (or so), we had this:

Back off ladies, he's mine. 
Then all that was left was a little refinishing.  We took our palm sander with a 60 grit paint striping sandpaper, and we're pleasantly surprised how quickly things cleaned up.

The top left of the box has been sanded.

Quite a difference from the left completed side to the right yet to be done.
Once sanded, I used a paint brush to apply some cedar colored deck stain to match the Adirondack chairs and beverage cart we already had.


Pardon the deck, it's been raining a lot lately and I couldn't get a better shot. The color of the deck box should fade to match the chairs better with a little time.

We still need to power wash the deck to remove the line from where the old box was.

As a reminder, here's what we started with:


Not bad, eh? I still need to sew some cushions for the seat and some pillows to rest across the back so that this can be a little couch. Don't worry, you know I'll tell you all about it when I do. (In annoying, painstaking detail!)  When we're not using the cushions, it will work perfectly to store them in the box to protect them from the elements, as well as other items we might frequently need on the deck like bug spray, sun screen and a bottle opener.  (What?  I said we'd keep it real with you all.)  I'm so happy that Bath Crashers sort of forced us out onto this deck, because I have a feeling that this is one of those projects that we wouldn't have gotten to for years if we literally hadn't been stuck out there together for a few hours.  But now this is a space that we can enjoy this summer and relax on, since I am incapable of relaxing in a room that still has projects left to do.  My mind either spins with processes, calculations and figures, or I just get up to get tools and get to work. 

Oh yeah, and those of you that are wondering about this guy which was also left on the deck- he hit the trash faster than you can say Paris Hilton.


In the wise words of Kenny Rogers, "You gotta know when to hold 'em, know when to fold 'em."


P.S. Does anyone else think that Nikia from The Voice looks just like a young, brunette Kenny Rogers?  Love him.